Available in the US, UK, Canada, France, Italy and other European countries.
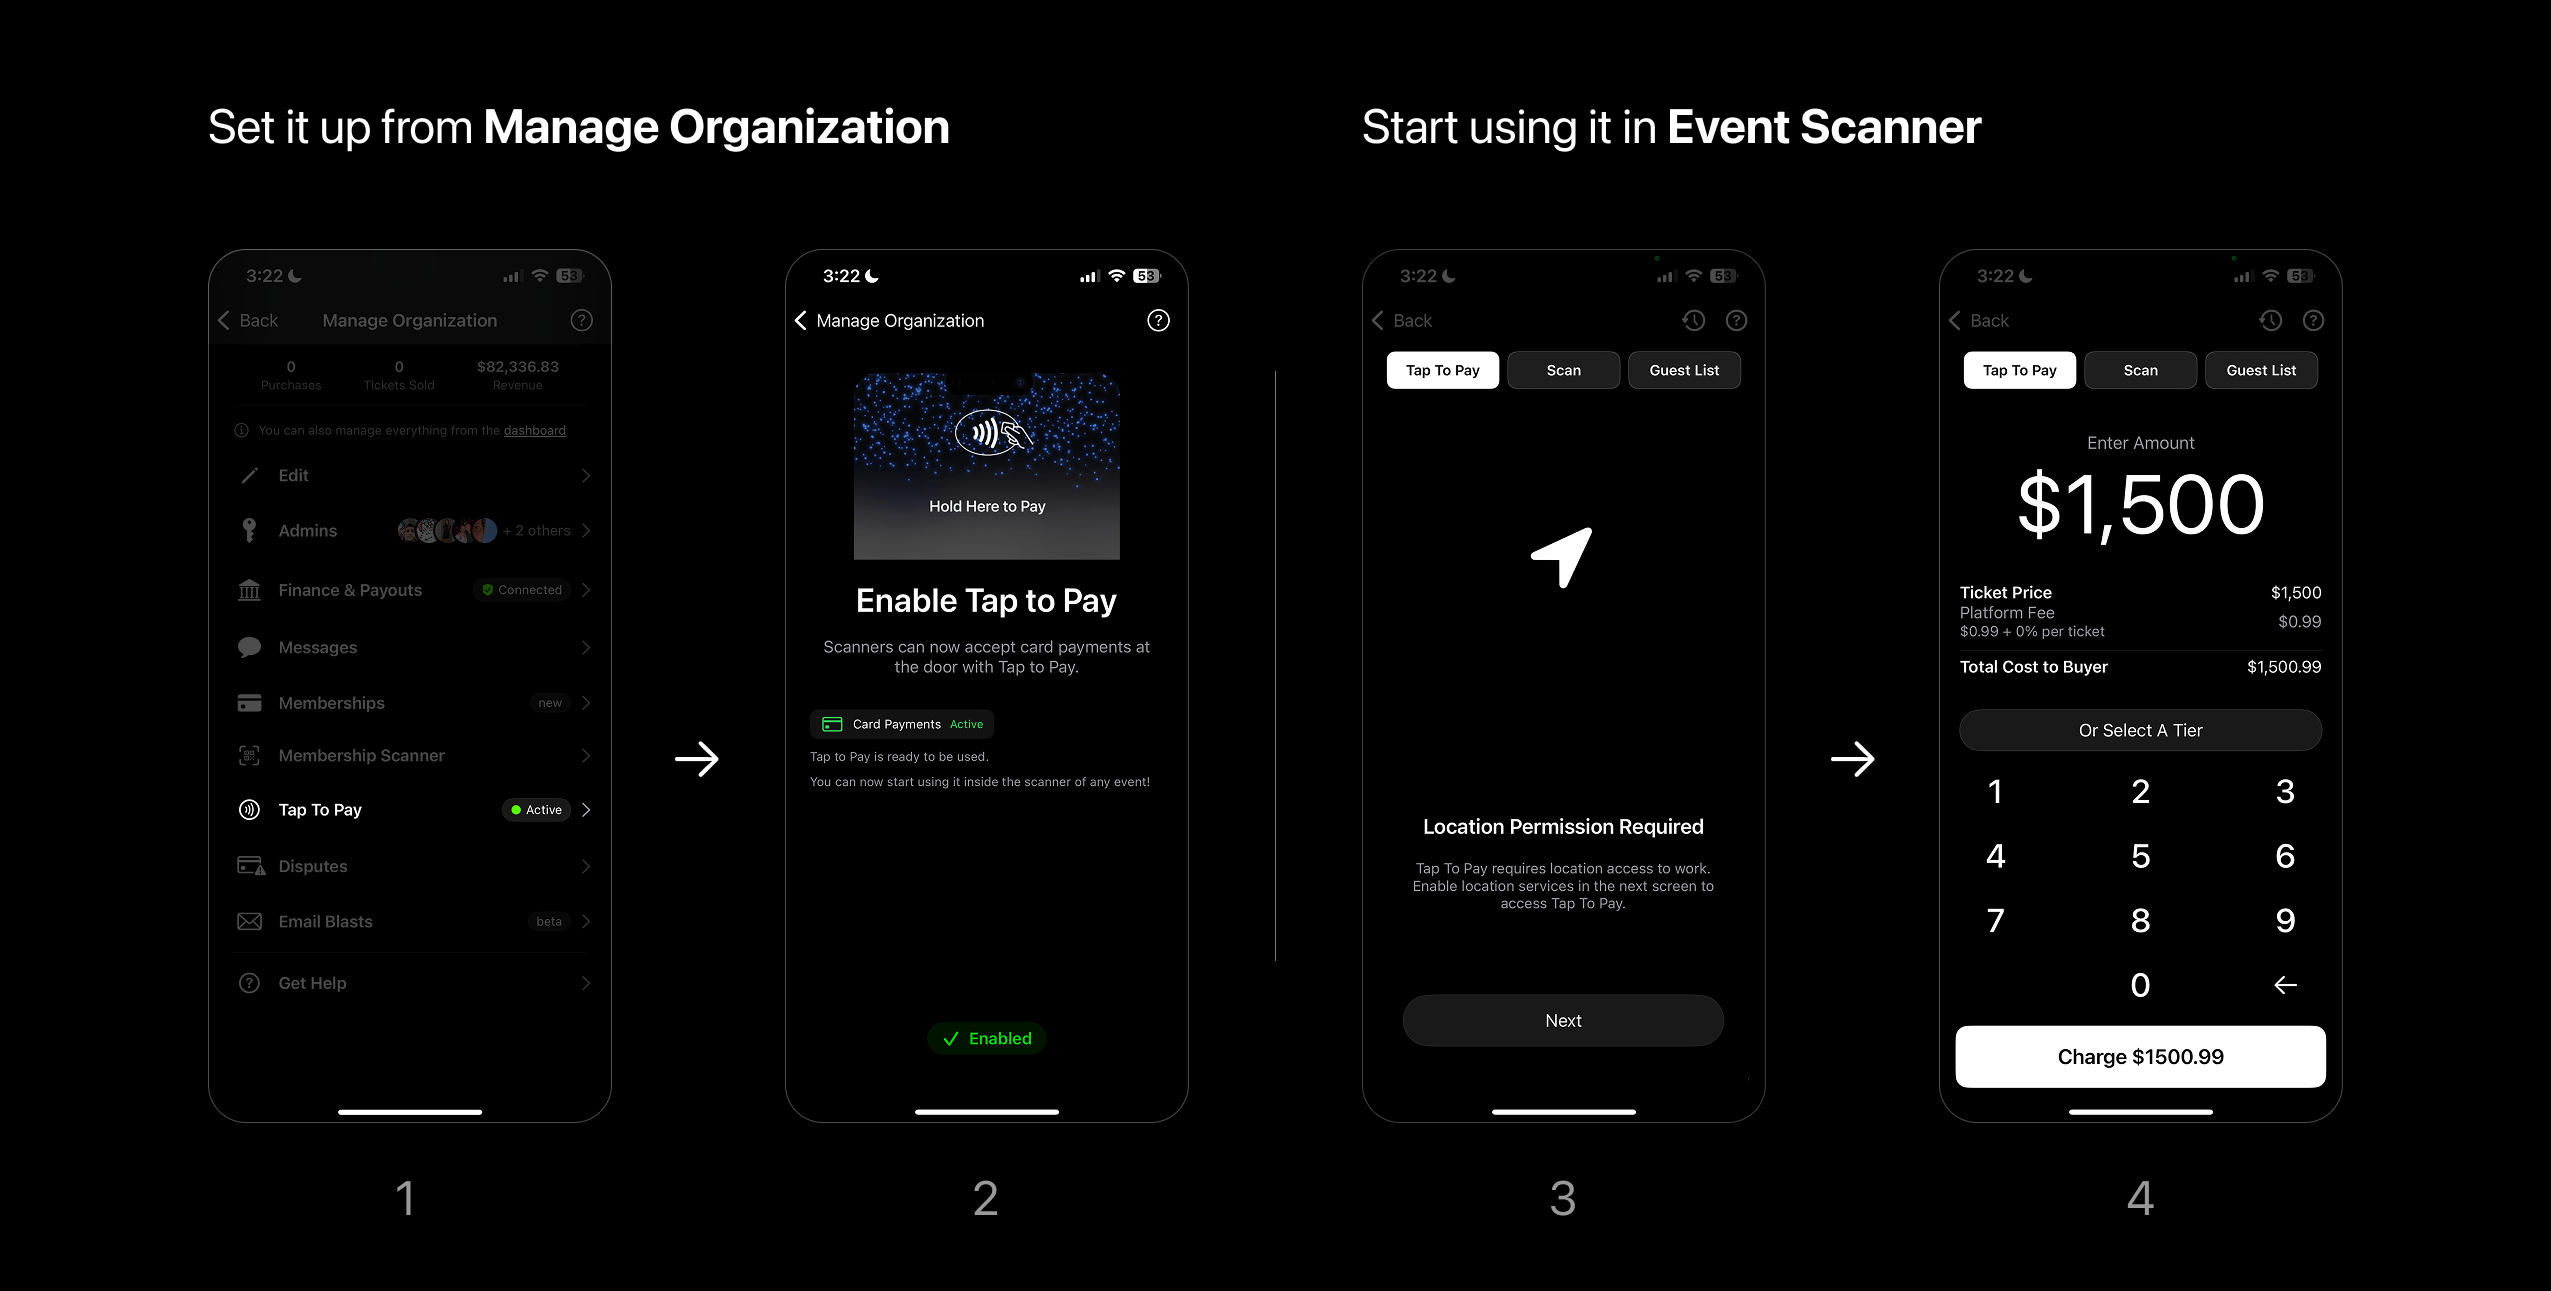
- Enable it from Manage Organizations.
- Tap to Pay > Enable
- Just set it up once to use in any event.
- Start using it within the Event Scanner.
- A new tab will appear left of the scan view.
- Enable Location services with Always Allow.
- All iOS scanners will be able to charge at the door.
We recommend setting this up at least a day before an event. As Stripe may require more information after enabling the service.
What are the ways to charge using Tap to Pay?
1. Custom Amount
You can enter a custom amount to charge:- Enter an amount and charge to process
- After payment, you’ll see a success screen
- You can optionally enter an email to send a receipt
2. Sell by Ticket Tier
You can also sell set ticket tiers using Tap to Pay.- While creating a Ticket Tier, turn Tap to Pay On in tier settings
- Select the ticket tier and adjust quantity if needed